Get it via Shopware Community Store:
23. Dezember 2022 // 10:00
Use Google Analytics 4 now: Google Tag Manager Template for activating GA4 tags using the codiverse plugin
Would you like to send tracking data from your shop (including Enhanced Ecommerce data) to Google Analytics 4?
Whether you have already set up a Google Tag Manager container or not, this short guide will show you how you can easily import a ready-made Google Tag Manager into your own account.
We provide you with a Google Tag Manager template that has already been set up. You simply have to import this into your existing Google Tag Manager and all Google Analytics 4 events will be sent automatically.
Don’t worry: It’s not all that crazy 🙂 Even for technical laypeople, these instructions can be implemented in under 5 minutes.
If you have any questions about setting up and customizing the Google Tag Manager, please contact our analytics and tracking partner “Conversion.Consulting” directly (accessible via https://conversion.consulting) or send an email directly to codiverse@conversion. consulting
Start by creating a Google Analytics 4 property (GA4) inside your Google Analytics account
Due to the fact that Google updates the process for opening up a new account and adding a Google Analytics 4 property very frequentlly at the moment, you can find the most up to date tutorial on how to open a Google Analytics 4 property over at Google: Click to open the tutorial.
Haven’t created a Google Tag Manager yet?
Then you can skip the next point about creating a backup of your “existing” Tag Manager and proceed directly to the instructions for downloading the template (click here and go to the point in the instructions)
If you have already set up a Google Tag Manager…
Create a “backup” of your existing Google Tag Manager.!
This way, you can be sure that you can switch back to the current version of your Google Tag Manager at any time if you make a mistake in the following steps..
To create a backup of your existing container:

Select the “Default Workspace”

This saves a JSON file on your computer, which you can use in an emergency to restore the current state of your Google Tag Manager.
From here, follow the instructions regardless of whether you already have a Google Tag Manager set up or not …
1. Download the Google Tag Manager template
- Click here to download the template.
- The download will start immediately and the file will be saved in your Downloads folder.
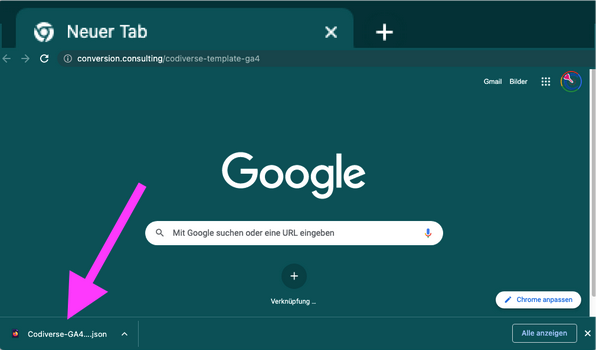
- You do not need to open this file. It is only used to later import it into your Google Tag Manager.
- This template contains everything you need to send all relevant data to Google Analytics 4.
2. Import the template you just downloaded into your existing Google Tag ManagerOpen
- Open Import-Cointainer dialog

- Please select the “Select an existing workspace” option and the “Merge” option.

- All imported variables, tags and triggers are clearly identified in the name so that they can be easily distinguished from your existing elements in the tag manager. The name of all imported elements always starts with “cdvrs” and identifies all elements provided by codiverse.


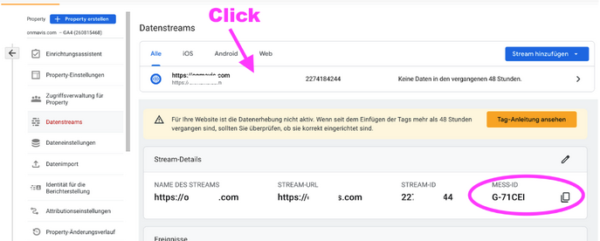
3. Now enter the measurement ID for your Google Analytics 4 account
- Open the variable named: “cdvrs.setting GA4 ID”
- There you store your own Analytics 4 „Measurement ID“ in the format „G-XXXXXX“

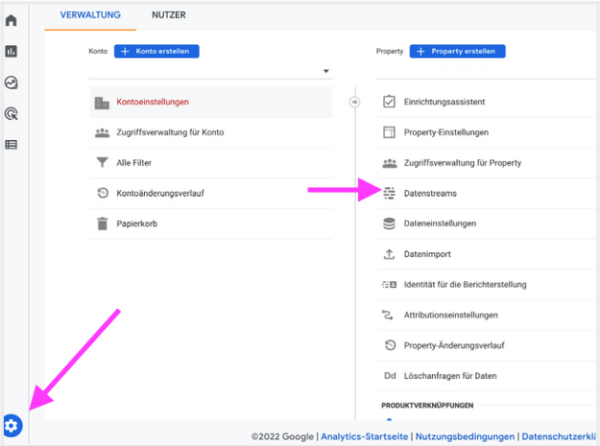
- You can find your Google Analytics 4 „Measurement ID“ in the administration area of your Google Analytics 4 property, under „Data streams“
- Copy Measurement ID


4. Important last point (to work GDPR compliant)
- Now adjust the “triggers” for these tags to suit your privacy situation. Depending on whether you use Shopware’s own „Consent Manager“ or a third-party solution (such as UserCentrics, CookieBot, Borlabs, etc.), choose one of the two following procedures.
- Are you using the Shopware Consent Manager?
Then you don’t need to do anything else. By default, all imported GA4 tags are only triggered if the visitor has consented to being tracked. - If you are using a third-party solution and not Shopware’s Consent Manager, then follow these instructions.
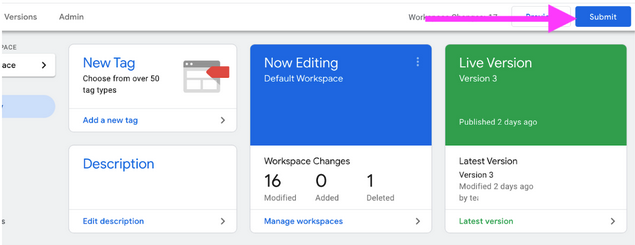
5. Publish your Google Tag Manager container now
6. Finished. That’s it.
From now on, the enhanced ecommerce data will run into your Google Analytics 4 account. The following „events“ are automatically transmitted to Google Analytics 4 from this point in time:
- view_item_list
- view_item
- add_to_cart
- remove_from_cart
- begin_checkout
- purchase
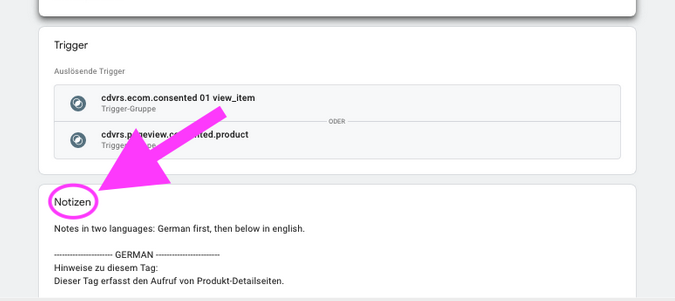
For more details about the function of the individual triggers, variables and tags that you have just imported, you will find additional information in each element at the bottom under the point: „Notes“.
Extended instructions for adjusting the triggers to track GDPR compliant (only necessary if you use a third-party solution for consent management)
Unfortunately, the large number of possible options and third-party solutions and their diverse functions make it impossible for us to provide general instructions here.
It is best to contact the support of your consent management tool. You will find instructions on how to adjust your Google Tag Manager there. Specifically, it’s about adjusting the „triggers“ of each tag. There you determine under which circumstances the corresponding tags may be triggered – or not. Depending on the information that the third-party tool provides about the visitor’s privacy preferences, these „triggers“ need to be adjusted.
Any questions? Setup problems?
If you have any questions about setting up and customizing the Google Tag Manager, please contact our analytics and tracking partner “Conversion.Consulting” directly (accessible via https://conversion.consulting) or send an email directly to